There are several ways to image a user’s computer. You can install Windows manually or use a computer imaging tool (which can save time and reduce the hazardous levels of caffeine you need just to get through the workday). Which approach works best depends on factors like the size, complexity, and distribution of your fleet.
We’ll lay out the pros and cons of imaging a computer manually and using two different imaging tools: disk cloning software and file-based imaging software like SmartDeploy.
Image computers manually
Imaging a computer manually means installing and configuring Windows, business software, and user settings on the target device without using a tool. Here’s what you’d typically do.
Install a fresh version of Windows from bootable media on the target computer.
Install all relevant Windows updates.
Download, test, and install hardware drivers and apps.
Configure the device (including domain joins, network mapping, and setting up local user accounts).
Repeat steps 1 to 4 for every machine you need to image. Mm, fun.
Despite the time and effort required, some favor this approach for the end-to-end control they get. (Or maybe it’s just a clever way to save their meager IT budget for the communal snack stash instead.)
When to image computers manually
Imaging computers manually makes sense if you only support a small number of devices — too few to make it worth investing in a computer imaging solution.
It can also be a good approach if your organization uses highly customized computer systems that need to be set up and configured in specific ways.
What to consider when imaging computers manually
To image computers manually takes time — from hunting down the right device drivers for each computer to working through tedious device configuration tasks. Doing this for one computer is fine, but repeating the process for dozens of machines? That’s hours of your life you’re never getting back.
This is where disk imaging tools come in handy.
Image computers with disk cloning software
Disk cloning software creates an exact copy of a physical reference computer’s hard disk (including the drivers and apps installed), capturing it as one monolithic image. We break down the general process below.
Set up a physical reference computer.
Install Windows and the latest updates.
Manually download, test, and install hardware drivers and apps.
Capture the disk image from the reference computer.
Deploy the cloned disk image to the target computer.
Manually configure the target computer and install any custom apps needed.
Repeat steps 1 to 6 for every hardware model you need to image.
When to use disk cloning software
Using disk cloning software works best if you’re imaging identical devices or if you need to create a system image backup of a specific device. Disk cloning tools are also useful if you support different types of operating systems since they can clone any type of operating system or device — as long as it can be read.
What to consider when imaging computers with disk cloning software
When using disk cloning tools to image computers, there are some important considerations to keep in mind.
You’ll need extra equipment and resources
With disk cloning, you typically need to create one cloned disk image per device make and model that needs imaging. Each disk image also requires one physical reference machine that cannot be used for anything else — costing you precious time and space to maintain.
You get less flexibility
It can be difficult to make dynamic changes to a cloned disk image during the deployment process. Disk cloning tools also don’t allow you to slipstream custom driver or app packages with your system image, making them less efficient for imaging hardware-diverse environments.
Well, what if you don’t want to deal with the extra equipment or slog through imaging multiple devices just because they’re different makes and models? In IT, there’s almost always a solution to any conundrum.
Image computers with file-based imaging software
Unlike disk cloning tools, file-based imaging software lets you create computer images that contain only the files and software you need — and not the entire hard disk of a reference computer. This is a more flexible, modular approach, where you can pair the driver and app packages you need with your OS image before deploying them to different machines.
Here’s what the SmartDeploy imaging process looks like.
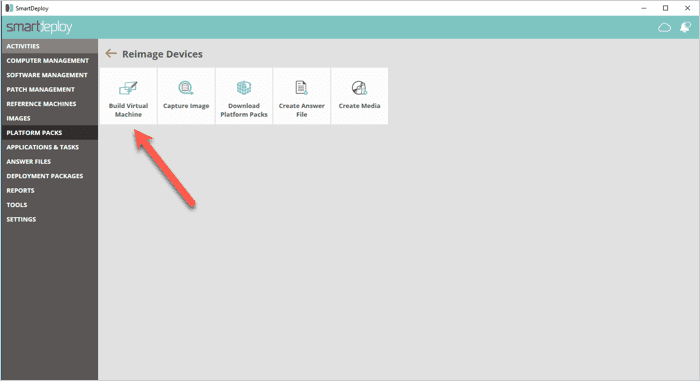
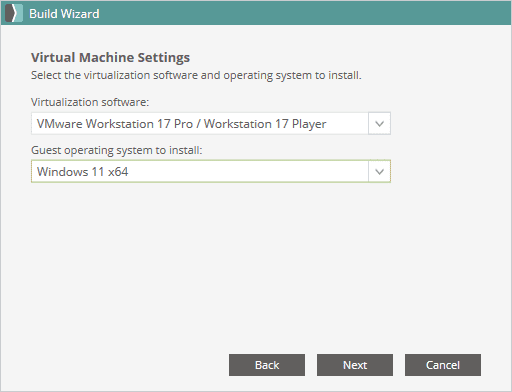
1. Create your reference virtual machine using SmartDeploy’s Build Wizard.
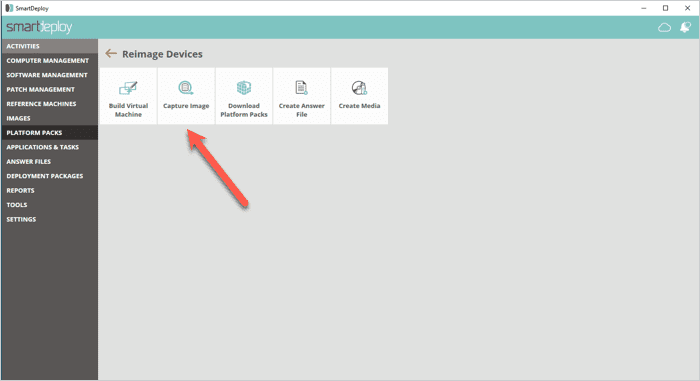
2. Install Windows and capture your reference image. (No need to run Sysprep. SmartDeploy does this automatically during deployment.
3. Download prebuilt, customizable driver packages (Platform Packs) from the SmartDeploy Platform Pack Library — or create your own if you need to.
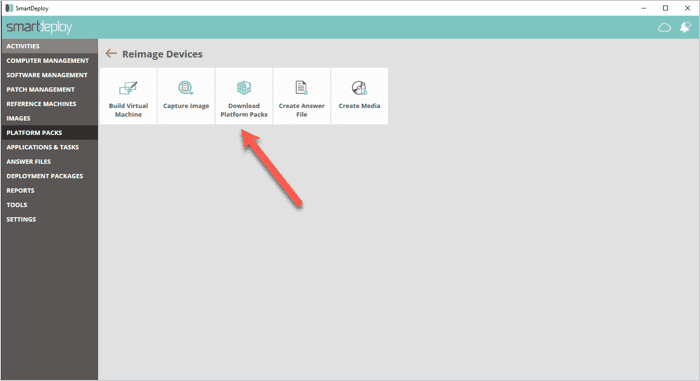
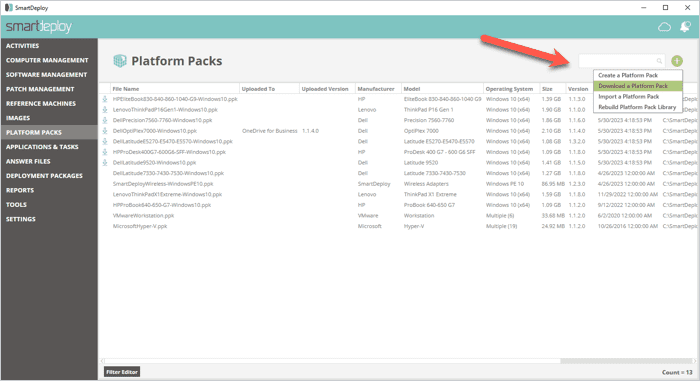
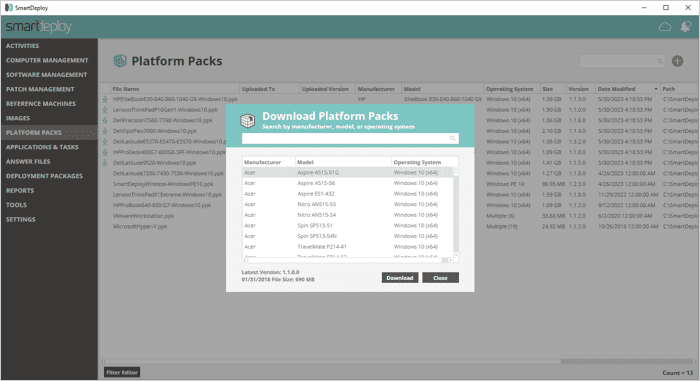
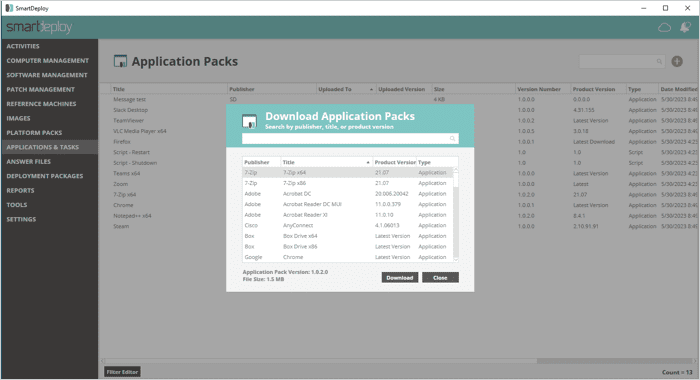
4. Download prebuilt Application Packs to add to your answer file in the next step. (Just like with Platform Packs, you can also create your own App Packs if you want.)
5. Create an answer file to automate deployment tasks, like domain joins or running custom scripts. (You can add multiple answer files for distinct groups to your deployment media and deploy them at the same time.)
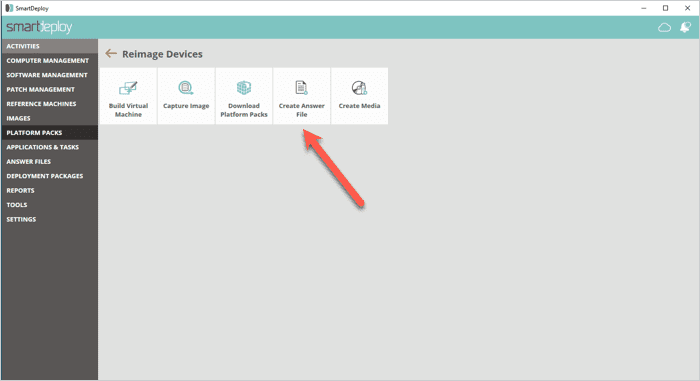
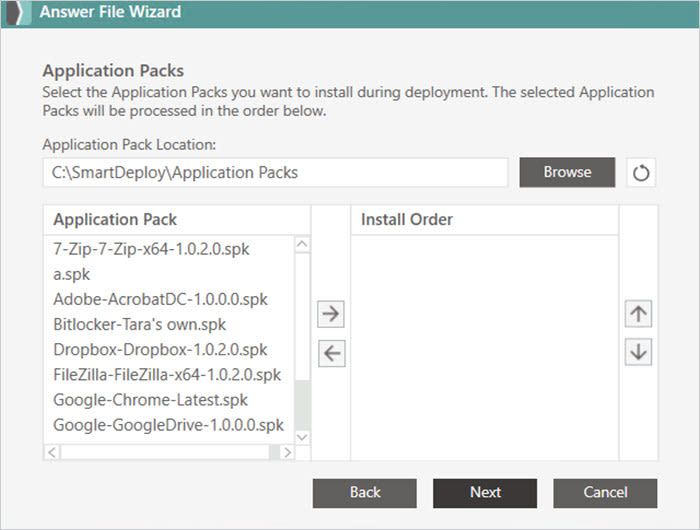
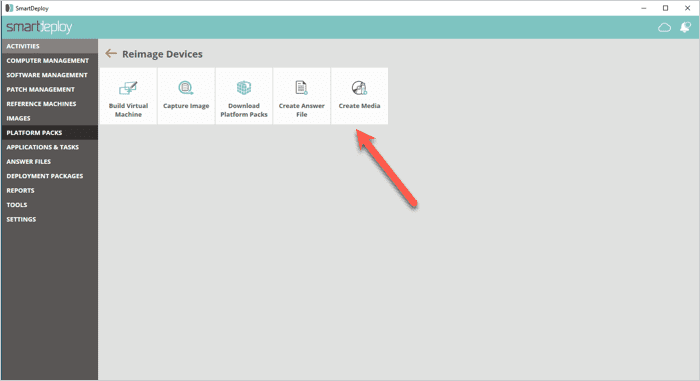
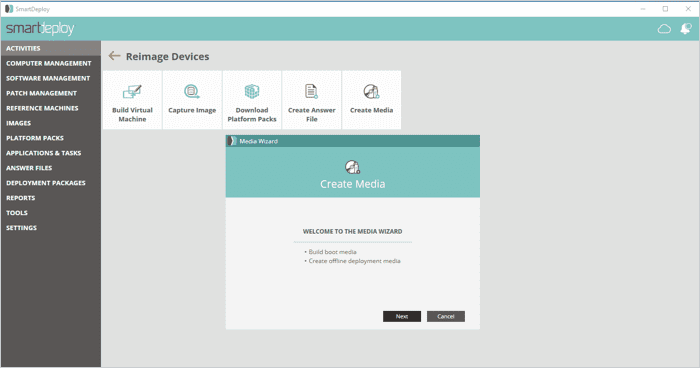
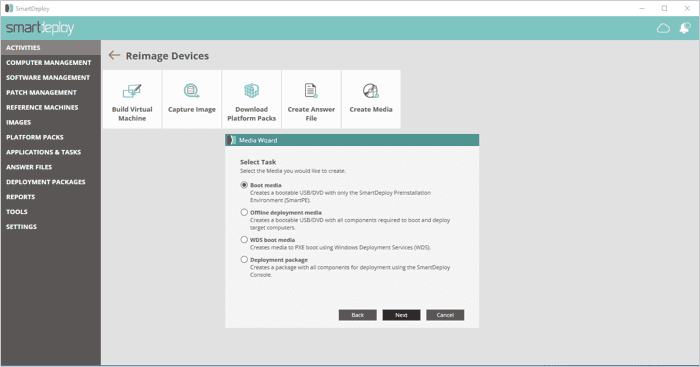
6. Create your deployment media using SmartDeploy’s Media Wizard. Add answer files and driver packs in this step.
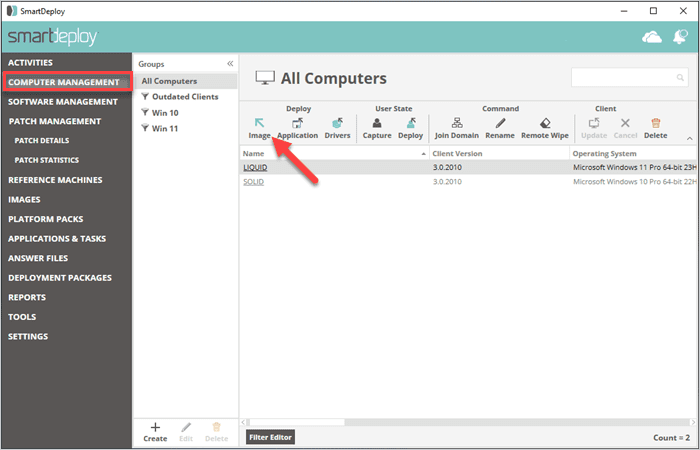
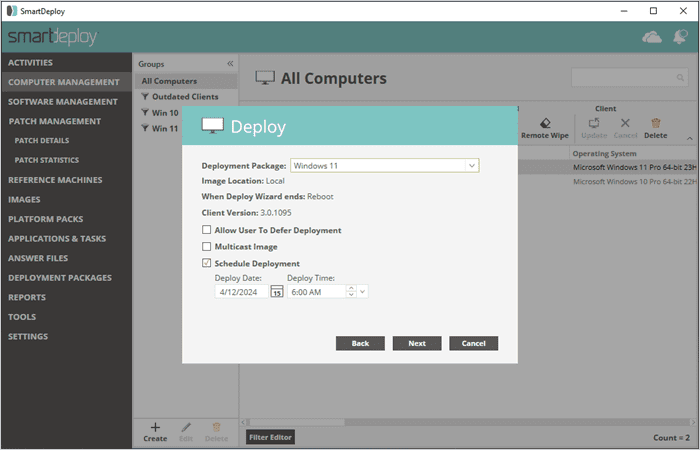
7. Go to the Computer Management view, select target devices or device group, and click Image to deploy your image. You can deploy using a USB drive, local network, or remotely over the cloud.
When to use file-based imaging software like SmartDeploy
File-based imaging software is useful when you’re imaging diverse hardware or discreet groups with unique software needs — since it can cater to different imaging scenarios more easily.
SmartDeploy, for example, lets you create system images that are hardware independent and apply them to any Windows machine. You can bundle different driver packages and custom apps with your Windows image in the same local or remote deployment — so you can image multiple devices or groups of devices more efficiently.
What to consider when imaging computers with file-based imaging tools
For folks who are more familiar with disk cloning, file-based imaging tools can take some getting used to. You may need to get comfortable working with virtual machines instead of physical reference computers, for instance. It’s like switching coffee brands; you won’t know which one you prefer until you give the new one a try.
Ultimately, choosing the right computer imaging software comes down to key factors like your use case, the size and locations of endpoints, and the complexity of your users’ software requirements.
Comparing different ways to image a computer
Manual imaging | Disk cloning software | File-based imaging software | |
|---|---|---|---|
Time-efficient | No | No | Yes |
Physical reference machines | No | Yes | No |
Automated deployments | No | No | Yes |
Suitable for hardware-diverse environments | No | No | Yes |
Easily scalable | No | Yes* | Yes |
*In non-hardware-diverse environments.
How to image a computer FAQs
What are computer imaging best practices?
When setting up user devices, consider these computer imaging best practices to save time and achieve smoother workflows.
Make a plan.
Choose an imaging approach that suits your use case.
Keep your base OS image generic.
Create a reference image for each use case.
Test before deploying.
Keep your reference images up to date.
Document your imaging workflows.
What’s the difference between computer imaging and a factory reset?
Computer imaging applies a fresh operating system image with apps, drivers, and settings to a user device. Imaging computers is common when rolling out new hardware, repairing system issues, or migrating to a new operating system. A factory reset restores a machine to its original OEM system state by deleting all existing user data, settings, and applications — and frees up the system volume license for that device. Factory resets can be used to decommission or recommission a user device.
Can you use Windows Autopilot or Microsoft Intune to image computers?
No, you can’t use Autopilot or Intune to image computers because they’re not imaging tools. Autopilot is used to apply predetermined configurations on the existing OEM Windows operating system in a new device while Intune is a cloud-based mobile device management (MDM) or mobile application solution (MAM).
Between dealing with help desk tickets, fixing the office printer, and yelling at users to stop writing their passwords on sandwich napkins, sysadmins have no time for tomfoolery.
SmartDeploy is designed to make life easier for IT folks like you by simplifying and automating computer imaging workflows where it makes the most sense. Try it free for 15 days or request a demo to learn more.

